
How to Animate Your Website
This week on #FilmTipFriday I show you how to break apart your website and animate it using Adobe Photoshop and After Effects!
This technique is good when you want to show off your website in a video, but want to get away from the old boring screen capture routine. The added perk is you will be able to get much more creative with your edit since everything will be individually layered.
Step 1 – Screen shot your site
Scroll down your website and take some screen shots. Make sure you leave some overlap between shots so you can line them up easier when you stitch them together.
Step 2 – Make a panorama
Stitch your shots together using Photoshop to create a panorama of your website. Now you’ll have a high resolution image of the entire site.
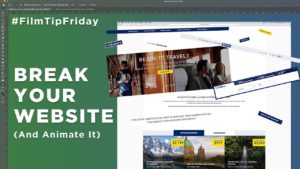
Step 3 – Break it down into layers
Use the selection tool of your choice to select each element you want to animate, and paste each one into a new layer. You should now be left with a site full of holes.
Step 4 – Fill in the gaps
This can be somewhat complicated depending on how complex the background is. Use the clone stamp tool to fill in the gaps in the background. Sometimes you can just use a solid color brush if you’re working with a simple background.
Step 5 – Bring it into After Effects
Now that we have our site broken down into layers, we can bring it into After Effects to start animating. Import your .psd as a composition so you retain your layers.
Step 6 – Animate it!
This is where you can get creative! You now have the option to animate each layer individually in any way that you want. Experiment with different things and make your site really stand out! If you want me to make a tutorial on ways you can animate in After Effects, let me know in the comments.
Step 7 – Create a new composition
Once you’re finished animating all of the elements, create a new 1080p timeline. In this new timeline, drag over your website composition as a pre-comped layer and make it 3D by clicking the little box icon next to the layer properties.
Step 8 – Add a camera
Go to Layer > New > Camera to add a new camera to your composition. Now you can set keyframes for the position, point of view and orientation to create a camera movement. To work with cameras in After Effects, I’d recommend using the camera tool by hitting C on the keyboard. This will let you drag your camera around to change the position. Hit C again to cycle through the other options like zoom or rotation.
Set your camera keyframes and there you have it, an awesome way to display your website!
Have you ever used this technique, or something similar to achieve the same effect? Let me know how you did it in the comments!