

How to Pick a Great Location for Your video

When you’re shooting a video, one of the most important things to think about is the location. Properly scouting your locations ahead of time will ensure that things will run smoothly during production. It will also give you a better idea of how it might look on camera, which can save valuable time on set. There’s a lot to look for when scouting, so here are a few of the most important factors to keep in mind.
1. Scout at the appropriate time
You will want to scout the location at around the same time of day you plan on shooting, especially if it’s outside. This will ensure that the lighting conditions are similar to what they will actually be during production. Take note of where the sun is, and what the weather is like. This effects the quality of the light, the shadow angles, and how much contrast your scene will have. Checking in the right conditions will help you decide what lighting tools you will need to get the look you’re going for. There are a few great apps that use GPS to show the path of the sun throughout the day, so take a look at those and see how the lighting will change over time.
Sun Surveyor Lite is a great free tool!
2. Lighting
Lighting is one of the most important factors in making a video look professional. Make sure your scene is well lit, and not giving off the wrong vibe. If your video is supposed to be light and happy, you don’t want moody, contrasty lighting. Take a look at how much lighting your location has naturally, and decide how much light you’ll have to bring in. Utilize practical light sources like desk lamps or windows, and place your actors strategically. You want to avoid shooting straight into a window, since that’s going to silhouette your actor, and completely over expose your background (unless you have a ton of lighting to match the outdoor exposure).
Another important thing to keep in mind is color temperature. You can use this to your advantage to create contrast, but if not controlled properly it can ruin your shot. Daylight is usually around 5500K (Kelvin), which has a more blueish tint than the 3200K light bulbs that are typically found in houses. The easiest thing to do if you’re a beginner is just keep everything daylight balanced so you don’t have to worry about varying color temperatures. Most fluorescent or LED lights nowadays are daylight balanced, another reason why those tend to be good choices.
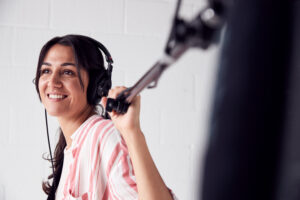
2. Sound
A lot of times when shooting video, people completely overlook sound. Sound is critical to having a professional quality production. Make sure to pay attention to the quality of the sound in the space. You want to avoid large rooms with hard surfaces, as they tend to reflect your voice and create more of a reverb. If that’s the effect you’re going for, it’s still better to have a clean, crisp recording. You can then add reverb later, which will allow you to completely control it. Use blankets, rugs, foam…anything soft will help dampen the sound, and keep it more controllable.
Keep in mind the sounds that are around you. Are you next to a busy intersection, or a fire station where an alarm will be going off frequently? Sometimes external sounds can ruin a shoot, even in a controlled environment. One time I had a shoot where we were trying to record interviews, and a truck started backing into a nearby alleyway to empty about ten dumpsters. We had to wait for them to finish and lost about fifteen valuable minutes with an important client. Everything worked out in the end, but the moral of the story is be prepared for any little hiccup, and have a backup. It’s very hard to fix bad audio, so make sure you get it right during shooting.
We’ll go more into general tips for capturing great sound in a future post!
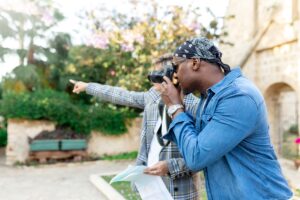
3. Know your surroundings
This goes along with the previous sound tip. What elements are around you that could effect your shot? If you are shooting in public, you won’t be able to control what happens in the background. If you want consistency take after take, you will want to be in an environment that you can control completely. It’s best to properly secure your locations ahead of time, and make sure everyone is aware of possible issues. It’s also a great idea to notify everyone around that you will be filming. If possible, have someone dedicated to making sure that nothing interferes with production.
4. Accessibility
Is your location easily accessible? Think about what type of equipment you will have to bring, as well as the size of your crew. Will you be able to fit everything? Will you have to come up with creative solutions to get the shot you want? Will your crew members be able to find and get to the location easily? Will they have parking when they get there? Will neighbors complain about your big lighting set ups? Will the location even have the power you need? Will you need extension cords or power strips?
These, and many other questions come into play when figuring out if a location is suitable. Figure out your shot list ahead of time, so you can look out for locations that match all of the criteria, as well as your vision. Just as importantly, figure out where you won’t be shooting, and use that area for staging all of your equipment, food, cast etc. This saves a ton of time since you won’t have to keep moving everything around.
5. Permission
Permission is something that most definitely shouldn’t be overlooked. Imagine getting all of your equipment set up and all of your crew members ready, only to have your production shut down because you didn’t have permission to be there. Technically you need a permit to film in any public area, so keep that in mind when planning and work that into the budget. Sometimes you can film in public places without a problem, but the bigger the production is, the more likely you are to raise attention. Use your best judgement and treat every location with respect.
Small businesses or private property will be your best bet, since you can usually work something out with the owners. Let them know you will help promote their company, or trade services in exchange for the location. In my experience, you’d be surprised how many places will happily let you use their location for free. Most people just like the excitement of seeing a film set, so they’re happy to oblige!
6. Take photos and notes
Go around the location and take as many photos as possible. If you already have your shot list or storyboard, try to take photos that match the shots as close as possible. Use a stand-in actor to get your composition, shot design, and even lighting figured out. Try to use the same camera you will be filming on if possible. Take notes of your camera settings, where you want everything set up, and what else you will need to make the shot look the way you want. Make a mockup storyboard using the photos to get a better idea of what the shots will look like put together, and what you need to fix. This will dramatically decrease your setup time during production. You will also go into shooting feeling less stressed and better prepared knowing where everything will go.
One of my favorite apps for this is Artemis. It has specific camera and lens choices, so you can make an awesome storyboard right from your phone!
These are just some of the things you will need to think about during your location scout. Try to take care of as many details as you can ahead of time so that you are prepared when it comes time to shoot. Knowing the ins and outs of your location will make the production flow smoothly, and give you peace of mind. It may also spark some great shot ideas that you may not have had if you were working off of a shot list without seeing the actual location.
If you’ve learned anything from this post, subscribe to my email newsletter where I’ll be releasing weekly blogs on video production and marketing. Leave a comment if there’s anything you want me to cover, or if you have your own tips to keep in mind when scouting locations.